You Found a Wasp Nest. Now What?
You’re cleaning the gutters. Or checking the shed. Or just walking past the eaves of your house.
And there it is.
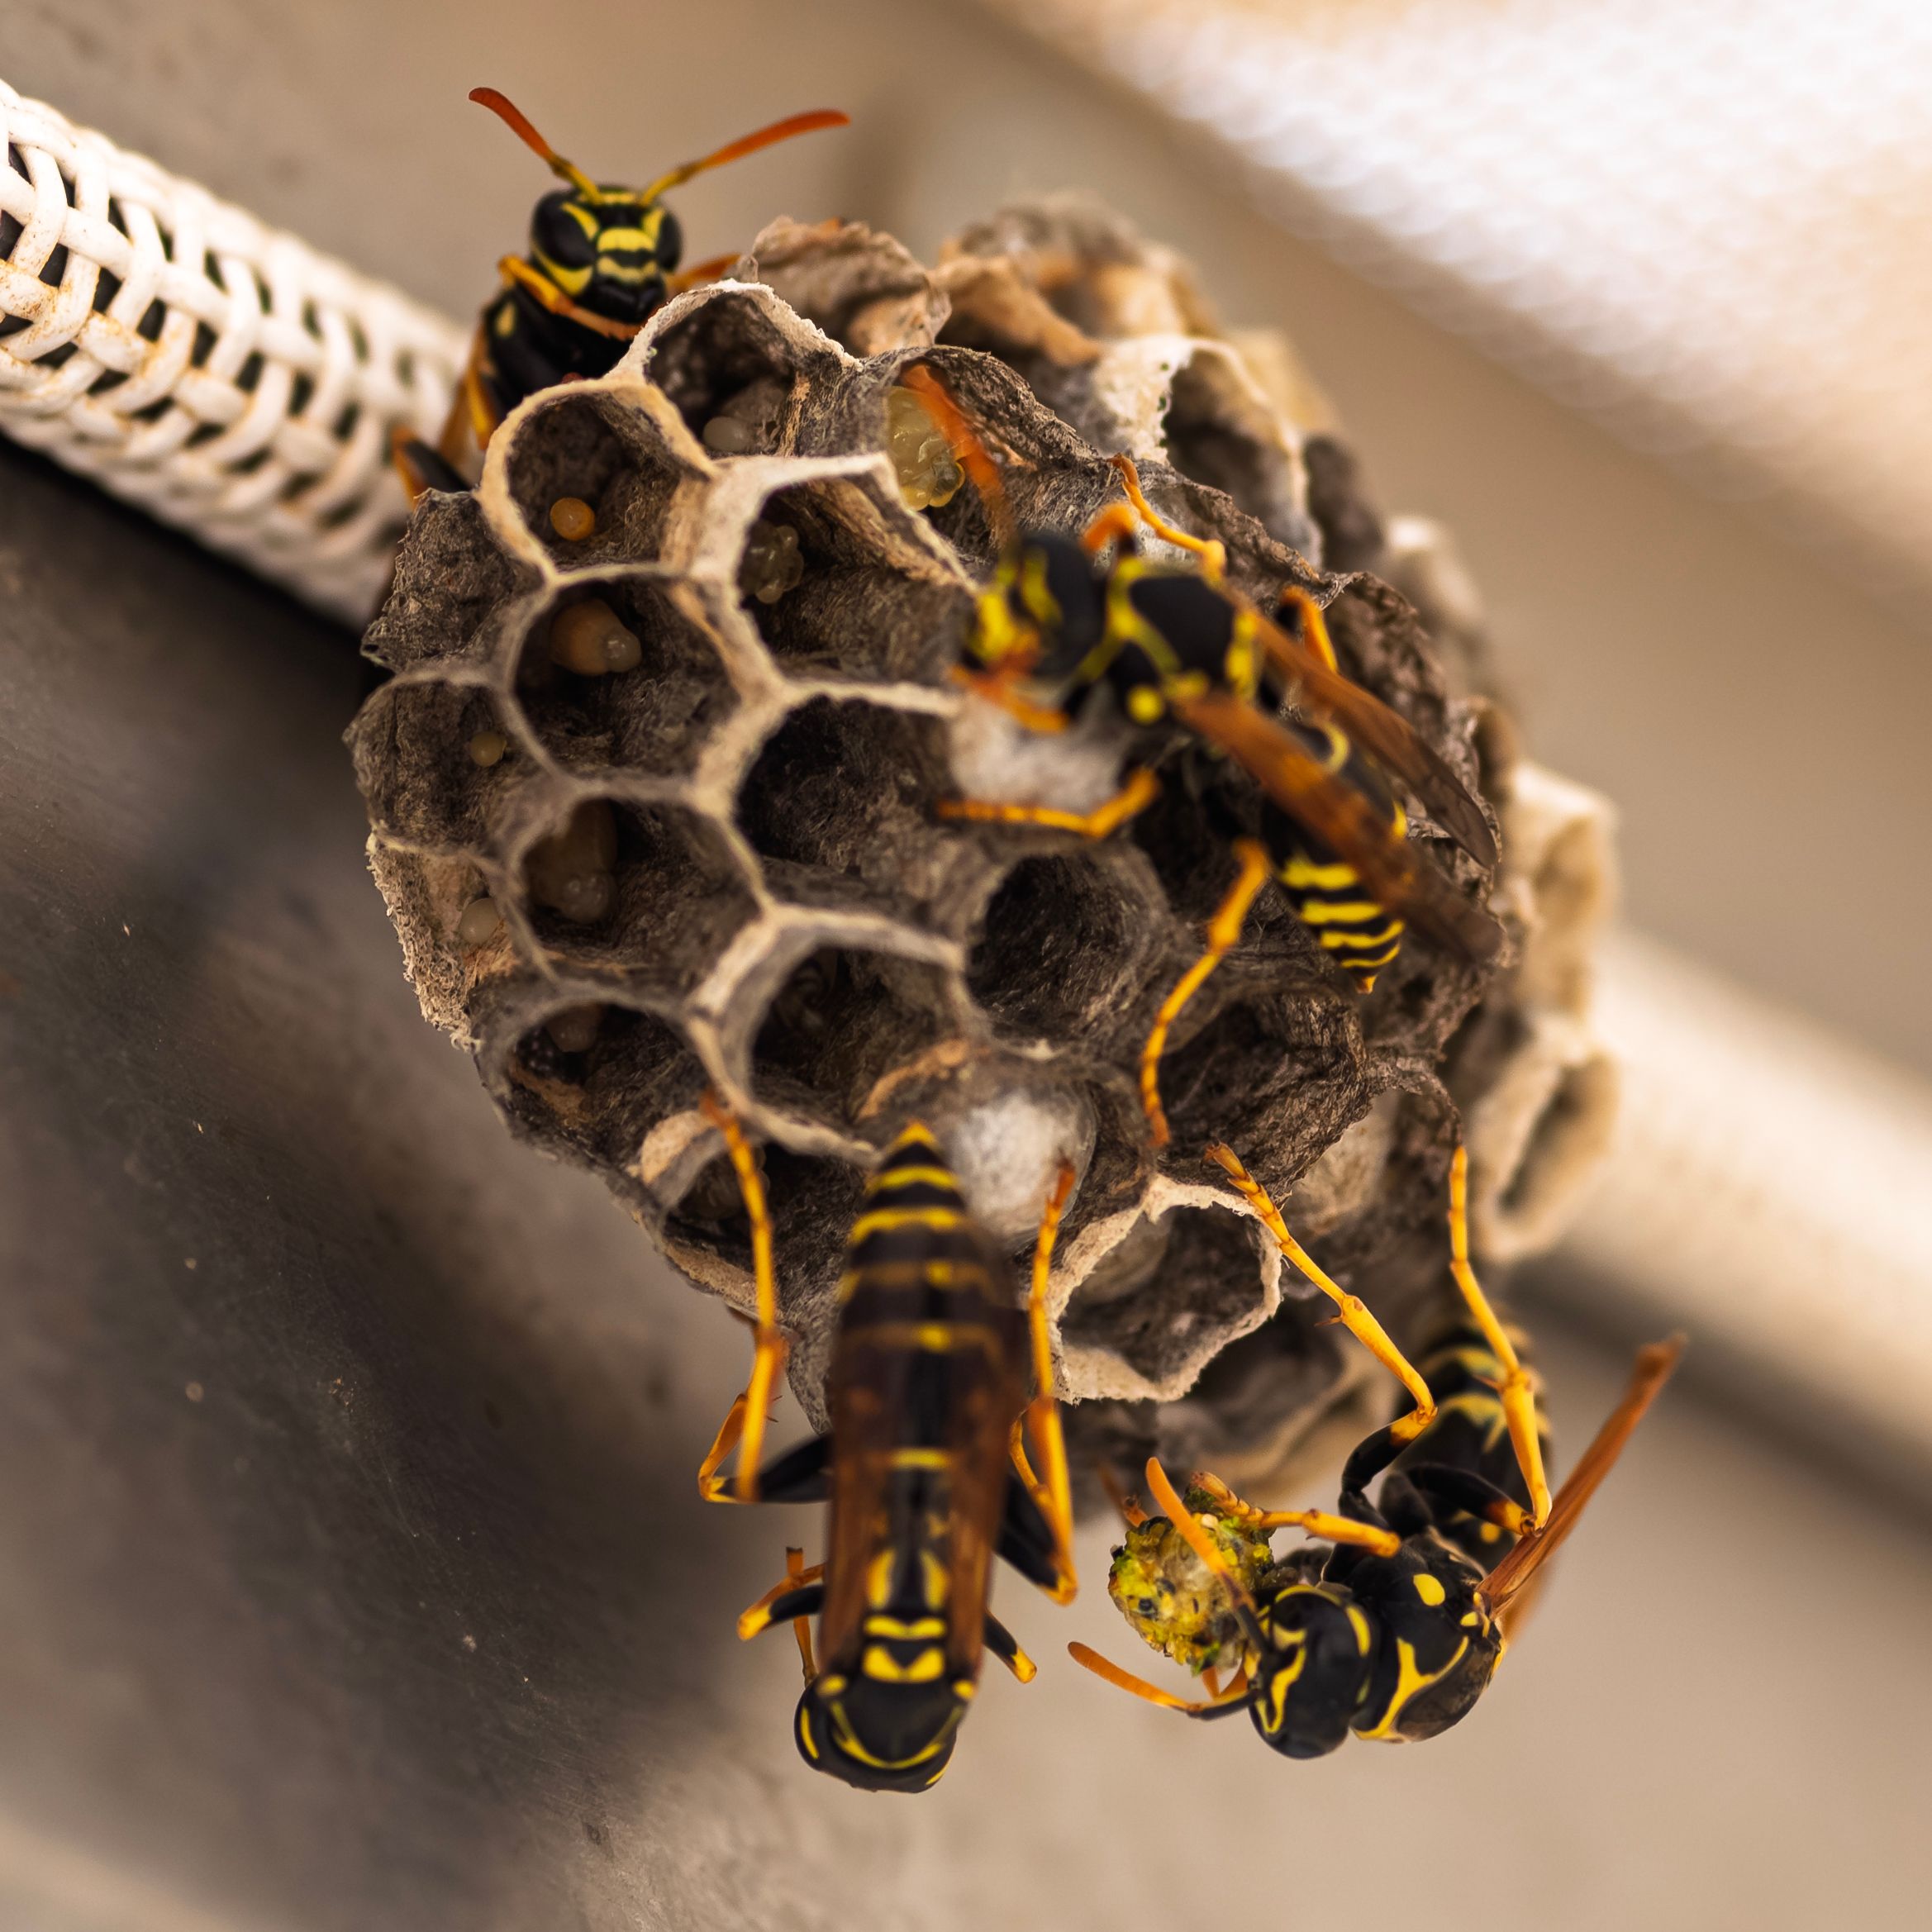
A grey papery structure, maybe the size of a tennis ball — or maybe the size of a basketball — with wasps moving in and out.
Your first instinct might be to back away slowly and pretend you didn’t see it.
Understandable. But ignoring a wasp nest doesn’t make it go away. It makes it bigger.
Here’s how to deal with it properly — and safely.
First — How Big Is the Problem?
Before doing anything, assess the situation honestly.
Small nest (golf ball to tennis ball size, early season)
This is manageable yourself with the right approach and equipment. Probably contains a few dozen wasps.
Medium nest (tennis ball to football size)
Doable yourself but requires more caution. Could contain a few hundred wasps.
Large nest (basketball size or bigger, often late summer)
This is professional territory. Could contain thousands of wasps. Disturbing a nest this size without proper protective equipment is genuinely dangerous.
If in doubt — and especially if anyone in your household has a wasp sting allergy — call a professional. It costs money but it’s the right call.
What You’ll Need for DIY Removal
If you’ve assessed the nest as small to medium and decided to proceed yourself, gather these first:
- Wasp and hornet spray with jet stream (reaches up to 6 metres)
- Protective clothing — long sleeves, long pants, closed shoes
- Safety glasses
- A torch with a red filter or red cellophane (more on this below)
- A plastic bag for disposal
- An escape route planned in advance
The Golden Rule — Timing
Never attempt wasp nest removal during the day.
Wasps are most active during daylight hours when worker wasps are out foraging. The nest population is at its lowest during the day — but the wasps that ARE home become extremely defensive and aggressive when disturbed.
The best time is at night — specifically 1-2 hours after dark when all wasps have returned to the nest and are inactive.
Why Red Light?
This is the trick most people don’t know.
Wasps cannot see red light. While white light from a torch will alert and agitate them, a red light lets you see what you’re doing without triggering their defenses.
Cover your torch with red cellophane or use a torch with a red light setting. This single tip makes the entire process significantly safer.
Step by Step — Removing a Small to Medium Nest
Step 1 — Plan Your Escape Route
Before you do anything, walk the area in daylight. Identify exactly where you’ll retreat to if things go wrong. Make sure the path is clear of obstacles. Know exactly how many steps it takes to get from the nest to safety.
Step 2 — Wait for Nightfall
Wait until at least 1-2 hours after dark. The later the better — this gives all foraging wasps time to return.
Step 3 — Approach Slowly with Red Light
Move slowly and quietly. Sudden movements and vibrations alert wasps even in darkness. Use your red light to illuminate the nest without triggering alarm.
Step 4 — Spray from a Distance
Position yourself at the maximum range of your spray — most wasp sprays reach 4-6 metres. This distance is your safety margin.
Spray directly into the nest entrance. Most products recommend a sustained spray of several seconds directly into the opening.
Step 5 — Retreat Immediately
As soon as you’ve sprayed, retreat along your planned escape route. Don’t wait to see what happens. Don’t take photos. Just leave the area.
Step 6 — Wait 24 Hours
Do not approach the nest again for at least 24 hours. The spray needs time to work through the colony. Some wasps may still be active during this period — stay away from the area entirely.
Step 7 — Confirm and Remove
After 24 hours, observe from a distance during the day. If there’s no activity the colony is likely eliminated.
At night, approach again with your red light. If there’s no movement, the nest can be removed:
- Wear gloves
- Carefully detach the nest from its mounting point
- Place immediately into a sealed plastic bag
- Dispose of in your outdoor bin
Step 8 — Clean and Inspect
Clean the area where the nest was attached. Inspect for any damage to your roof, eaves, or siding that may have allowed the wasps access. Seal any gaps to prevent future nests in the same location.
What If the Nest is Inside a Wall Cavity?
This changes things significantly.
Nests built inside wall cavities, roof voids, or other enclosed spaces are much harder to treat effectively and the wasps have nowhere to go except potentially into your living space if disturbed incorrectly.
For wall cavity nests:
- Locate the entry point — usually a small gap where wasps enter and exit
- Apply wasp dust (a powder formulation) into the entry point at night — the wasps will track it into the nest
- Do NOT seal the entry point immediately — trapped wasps may chew through drywall to find another exit, potentially into your home
- Wait several days for the colony to die off before sealing
Honestly — wall cavity nests are where I’d recommend calling a professional. The complexity and risk increase significantly.
Common Mistakes to Avoid
Using water
Spraying a nest with a hose seems logical but it doesn’t kill wasps effectively — it just makes them very, very angry. And now they’re angry, alive, and flying at you.
Burning the nest
Some old advice suggests burning wasp nests. This is dangerous, often ineffective, and can easily start a fire on your roof or in your eaves. Don’t do it.
Removing during the day
We’ve covered this but it bears repeating — daytime removal dramatically increases your risk of multiple stings.
Blocking the entrance first
If you block the entrance before the colony is dealt with, you trap angry wasps inside with potentially only one way out — into your house through whatever gap they entered from originally.
Not having an escape route
In the dark, panic can disorient you. Know your path before you start.
What If You Get Stung?
Even with all precautions, stings can happen. Here’s what to do:
- Move away from the area immediately — calmly, not in a panic which can attract more wasps
- Remove the stinger if visible by scraping sideways with a card — don’t squeeze it as this can release more venom
- Wash the area with soap and water
- Apply a cold pack to reduce swelling
- Take an antihistamine if you have one
Seek immediate medical attention if:
- You experience difficulty breathing
- Swelling spreads significantly beyond the sting site
- You feel dizzy, faint, or nauseous
- You’ve been stung multiple times
- You have a known wasp allergy
If anyone in your household has a known severe allergy to wasp stings, professional removal is strongly recommended regardless of nest size — the risk simply isn’t worth it.
Preventing Future Nests
Once you’ve dealt with this nest, reduce the chance of new ones:
- Inspect eaves, roof voids, and sheds each spring before nests establish — small nests in spring are far easier to deal with than established nests in late summer
- Seal gaps in roofing, fascia boards, and wall cavities
- Consider hanging a decoy nest — wasps are territorial and often avoid areas where they perceive another colony exists
- Keep outdoor bins sealed — wasps are drawn to food waste and sugary residue
When It’s Definitely Time to Call a Professional
✓ The nest is larger than a basketball
✓ The nest is inside a wall cavity or roof void
✓ Anyone in the household has a wasp allergy
✓ You’re not comfortable with heights if the nest is elevated
✓ The nest is in a location with no safe approach or retreat path
✓ It’s a species known for aggression — European wasps in Australia, for example
There’s no shame in calling a professional. They have protective suits, professional grade products, and experience. Sometimes the smartest DIY decision is knowing when not to DIY.
Final Thought
A wasp nest is one of those problems that genuinely gets worse the longer you leave it. A nest you could remove yourself in spring becomes a professional job by late summer.
If you’re going to handle it yourself — darkness, red light, distance, and a clear escape route are your four best friends.
And if any part of this guide made you think “that sounds like more than I want to deal with” — that’s a perfectly valid conclusion. Call a professional. Your safety is worth more than the cost of a callout.
This article contains affiliate links. If you purchase a product through our links we may earn a small commission at no extra cost to you.